Quickstart: Desktop
Install FlightDeck Desktop, open a repository and start your first two agents. This takes about five minutes. The agents run on your own computer. To run them on a separate machine, follow this page up to step 1, then continue with Quickstart: Worker.
Before you start
- Git on your
PATH. - At least one agent CLI, installed and logged in: Claude Code (
claude), Codex (codex), OpenCode (opencode) or the Cursor CLI (cursor-agent). Run it once in a terminal and finish its login. FlightDeck starts these tools for you, using your normal login.
1. Install the app
Download the latest FlightDeck Desktop release from GitHub Releases. Releases named "FlightDeck Desktop" are the app. The others are the command-line tool.
| System | File to download |
|---|---|
| macOS, Apple silicon | FlightDeck-<version>-macos-aarch64.zip |
| macOS, Intel | FlightDeck-<version>-macos-x86_64.zip |
| Windows | FlightDeck-windows-x64.msi |
| Linux | .deb, .rpm or .AppImage |
On macOS, unzip the file and drag FlightDeck.app into Applications.
The app checks for new releases once a day and shows a banner with Update now when one is out.
2. Open a repository
Start FlightDeck. The launcher lists your recent projects. Choose Open
project… (Cmd-O on macOS) and pick any folder that is a Git repository.
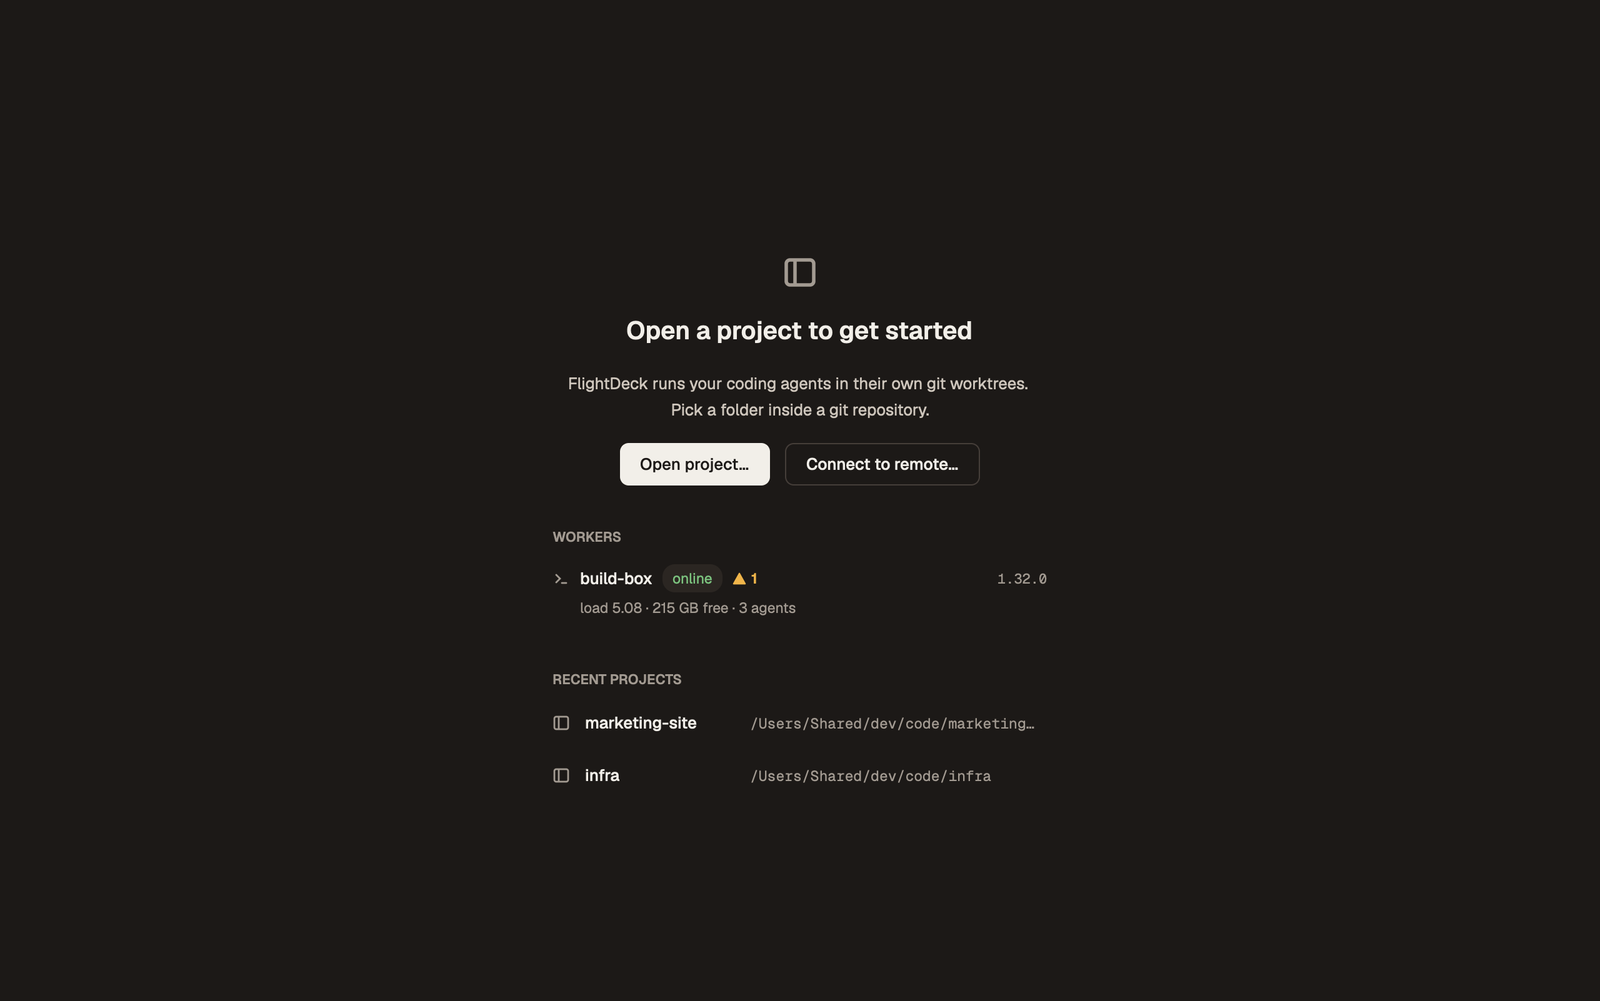
The first time you open a repository, FlightDeck creates a .flightdeck/ folder
in it and adds a few lines to .gitignore. It changes nothing else.
3. Start an agent
- Press
Ctrl-n, or click New agent in the sidebar. - Pick an agent, for example Claude Code.
- Name the task, for example
fix-login, and pressEnter.
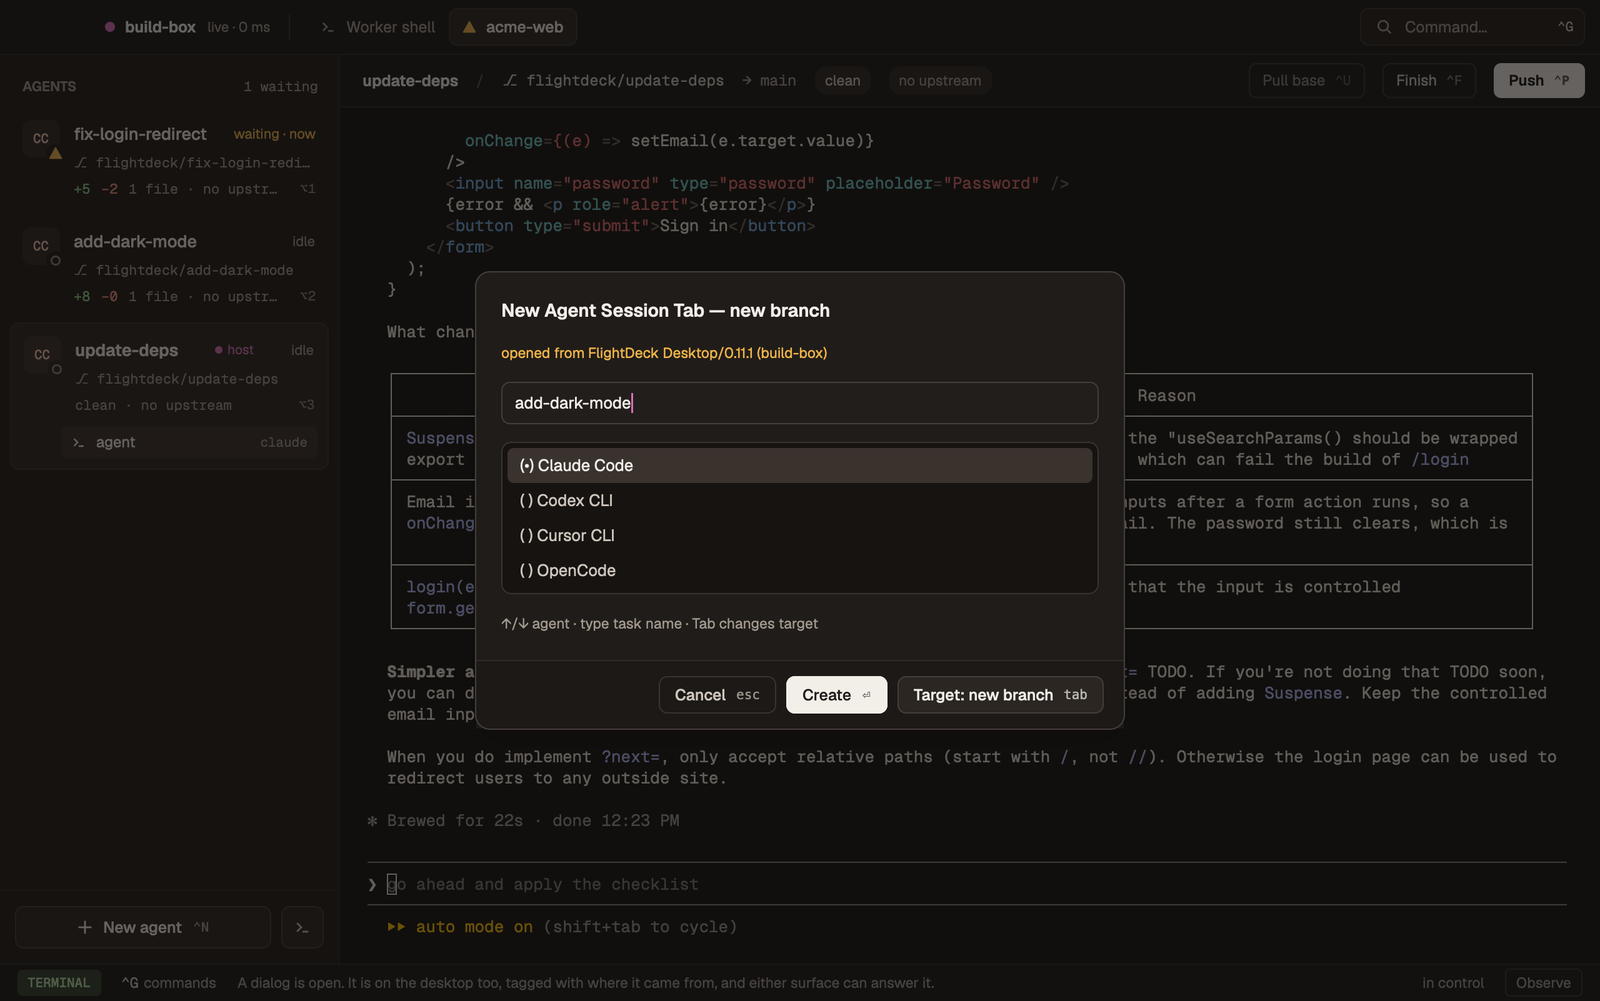
FlightDeck creates the branch flightdeck/fix-login, checks it out in its own
folder under .flightdeck/worktrees/, starts the agent there and puts your
cursor in its terminal. Type your prompt as you normally would.
Press Ctrl-n again and start a second task straight away. The two agents work
on different branches in different folders, so they can't get in each other's
way.
4. Keep an eye on them
Each agent has a row in the sidebar that says what it is doing:
- working: the agent is busy,
- waiting: it asked a question or wants permission,
- done or idle: it finished its turn and waits for your next prompt.
You get a system notification when an agent needs you or finishes, so you can
work on something else in the meantime. Click a row to switch to that agent, or
press Alt-m for Mission control: every running agent as a tile, the
ones that need you first.
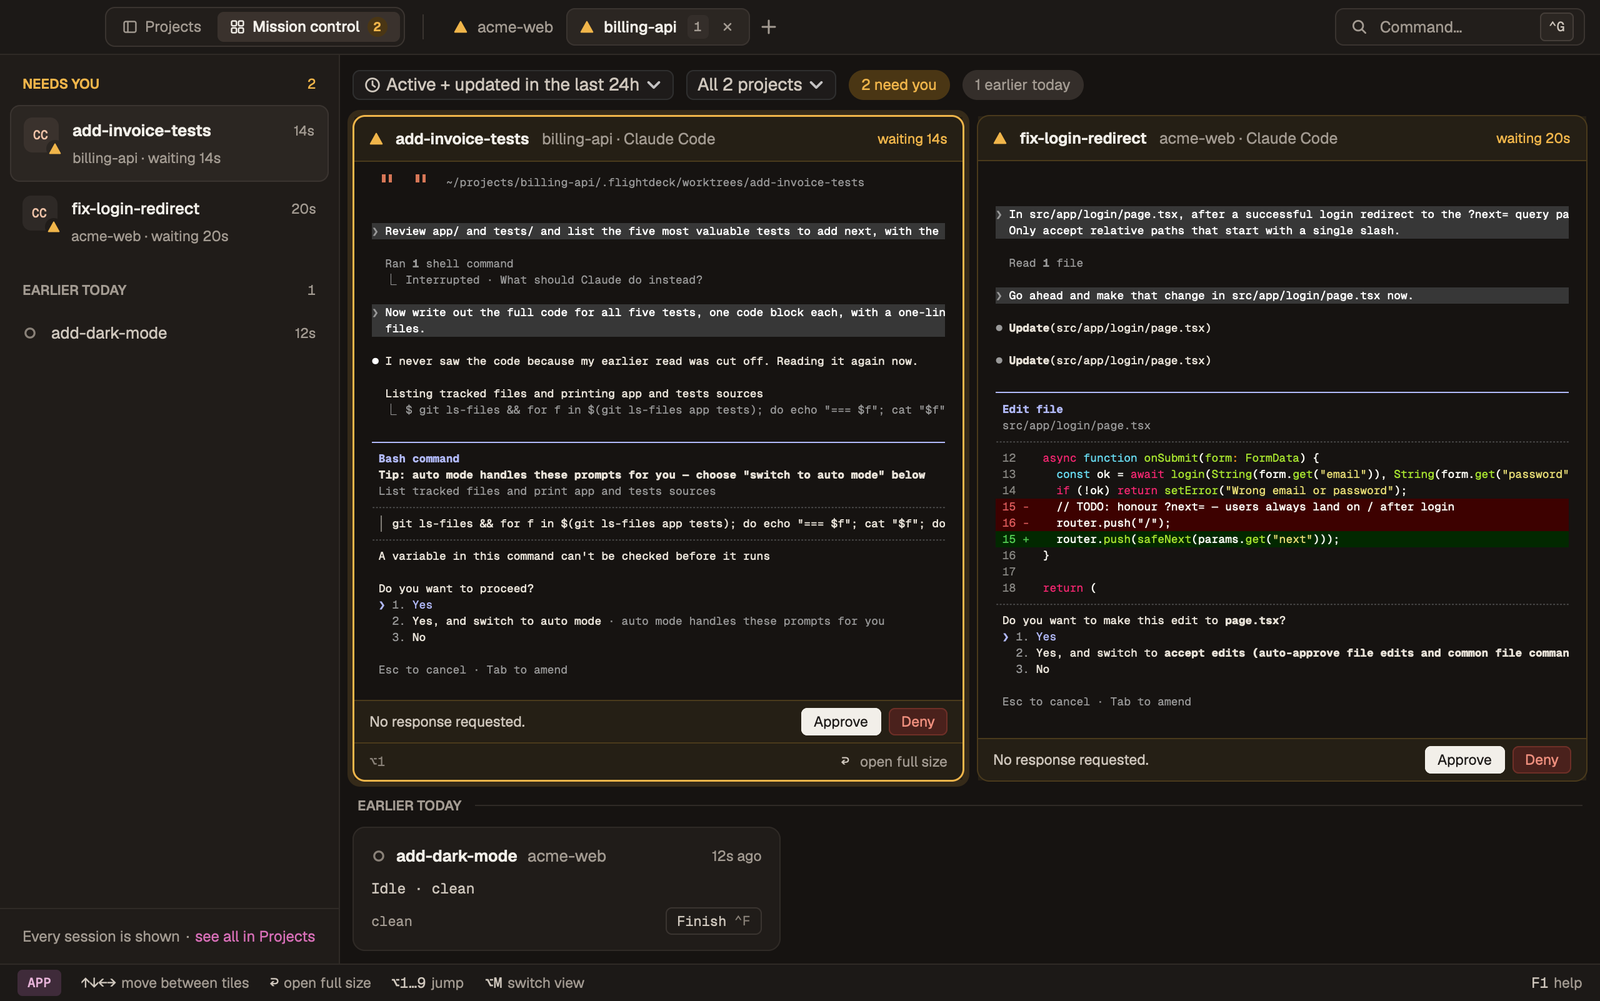
5. Ship the work
You and your agent make the commits, the way you always do. When a branch is ready:
- Click Push in the git strip at the bottom (or press
Ctrl-p). FlightDeck pushes the branch and, for a GitHub remote, shows the link to open the pull request. - Open the pull request in your browser.
- After it merges, click Pull base (
Ctrl-u) to update your main branch, and close the agent withCtrl-k.
The Git Workflow page covers rebasing, merging locally without a pull request, and cleaning up worktrees.
Two things worth knowing
Ctrl-g opens the command palette, a searchable list of every action. If
you forget a shortcut, use the palette.
| Shortcut | Action |
|---|---|
Ctrl-n | New agent |
Alt-↑ / Alt-↓ | Previous / next agent |
Alt-m | Projects ↔ Mission control |
Ctrl-t | Extra shell in this agent's folder |
Ctrl-p | Push the branch |
Ctrl-g | Command palette |
Next
Move the agents to an always-on machine and keep the Desktop as your screen.
The Desktop AppA tour of the window: projects, Mission control, terminals and the git strip.
Agent Tabs & WorktreesStart from an existing branch, rename, restart and close agents.
Git WorkflowPush, pull base, rebase, merge back, and what FlightDeck will never do.
Prefer the terminal?
The same workspace runs as a terminal UI. Install the flightdeck command:
brew install neworange-ruud/tap/flightdeck
Or, without Homebrew, on macOS and Linux:
curl --proto '=https' --tlsv1.2 -LsSf https://github.com/neworange-ruud/flightdeck/releases/latest/download/flightdeck-installer.sh | sh
On Windows, in PowerShell:
irm https://github.com/neworange-ruud/flightdeck/releases/latest/download/flightdeck-installer.ps1 | iex
Then run flightdeck inside any Git repository. Every shortcut on this page
works the same. See the Terminal UI tour.